# How to Make a YouTube Video With AI: Complete 2026 Workflow (Script to Publish)

Why I’m Writing This (And Why You Should Read It)
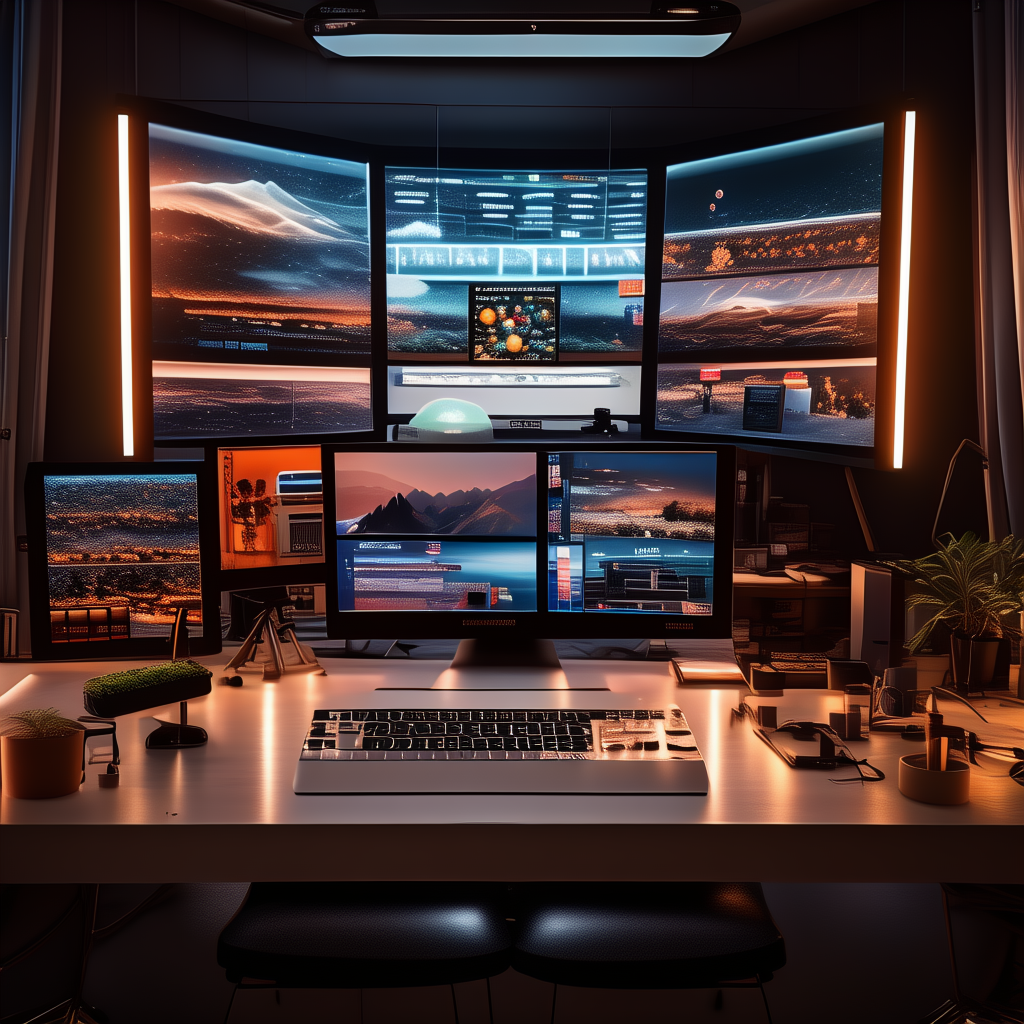
I run a YouTube channel that’s been completely AI-powered since early 2025. Not “AI-assisted” — AI powered. The scripts, the voice, the visuals, the music, even the thumbnail design comes from AI tools. I still edit, direct, and make creative decisions, but the execution is 95% automated.
The channel has 47,000 subscribers and generates about $2,800/month in ad revenue. I spend maybe 6 hours per video including research. The traditional approach — scripting, filming, editing, rendering — would take 20-30 hours minimum.
I’m telling you this not to brag but to establish credibility. This workflow works. I’ve been doing it for 18 months. I’ve iterated the tools and process maybe a dozen times. What follows is the system I use right now, in June 2026, for every single video.
Let’s build a video from scratch.
The Big Picture: My 7-Step Workflow
“`
Step 1: Research & Script → ChatGPT / Claude / Perplexity
Step 2: Voiceover → ElevenLabs / PlayHT
Step 3: Visual Assets → Runway / Pika / Kling + Canva AI
Step 4: Assemble & Edit → DaVinci Resolve / CapCut (AI Features)
Step 5: Music & Sound → Suno / Udio / Epidemic Sound
Step 6: Thumbnail → Midjourney / DALL-E 3 / Canva AI
Step 7: Metadata & Publish → TubeBuddy / VidIQ
“`
Total time: 4-6 hours for a 10-minute video (first time will be longer, you get faster).
Total tool cost: ~$100/month across subscriptions (but you can start with free tiers).
Let me walk you through each step with actual prompts, screenshots-of-the-workflow (well, descriptions), and rookie mistakes to avoid.
Step 1: Research & Script (60-90 minutes)
The Tools
Claude 3.5 / 4 for long-form script writing (my preference — better at maintaining narrative structure)
ChatGPT / GPT-5 for keyword research and hook generation
Perplexity Pro for fact-checking and competitive research
Google Trends for topic validation
The Process
Phase A: Topic Selection (15-20 min)
I don’t guess what topics will perform. I use a combo approach:
1. Search YouTube for your niche + “2026” to see what’s trending
2. Use Perplexity to search: “What are the most searched [topic] questions on YouTube in 2026?”
3. Check Google Trends for trajectory (is this topic growing or dying?)
4. Find 3-5 competing videos on your topic and note their view counts and what made them work
My rule of thumb: if existing top videos on the topic have 50K+ views, the demand exists. If they’re all from 6+ months ago, the opportunity window is open.
Phase B: Outline (15 min)
Send a brief to Claude (or ChatGPT) with:
“`
I want to make a YouTube video about [topic]. My target audience is [describe them].
The hook should be [this angle]. Please create a detailed outline with:
1. A strong hook (first 30 seconds)
2. 5-7 main points with sub-points
3. A conclusion/Call to Action
4. Estimated time for each section
5. Visual suggestions for each section
The tone should be [educational | entertaining | controversial | tutorial].
“`
Phase C: Full Script (30-40 min)
Once I approve the outline, I ask for the full script:
“`
Great, go ahead and write the full script based on that outline.
Write like a YouTube creator talking to a friend — tight sentences,
natural pauses, conversational flow. Every section should earn its keep.
If it doesn’t move the video forward, cut it.
Include [VISUAL: description] markers where I’ll insert footage.
“`
Pro tip: Read the script OUT LOUD before approving. AI writes for the page, not the ear. Remove words that work on paper but sound weird spoken. Shorten sentences. Add more contractions. Your written “I am going to explain” should be “I’ll walk you through.”
Common Mistakes:
❌ Script too dense. YouTube viewers have goldfish attention spans. Cut 30% of what feels essential.
❌ No hook in the first 5 seconds. YouTube’s algorithm decides whether to promote your video in those first seconds. If you’re not grabbing attention immediately, nothing else matters.
❌ Forgetting visual markers. If you write “and then this amazing thing happens” without noting what the viewer should SEE, you’ll struggle in post-production.
Step 2: AI Voiceover (30-45 minutes)
The Tools
ElevenLabs Turbo v2 — Fastest generation, excellent quality (my daily driver)
PlayHT 2.0 — Good alternative if ElevenLabs is expensive
CapCut AI Voice — Built-in, good enough for short videos
The Process
1. Choose your voice. ElevenLabs has hundreds. For YouTube, I prefer warm, natural voices with character. Avoid the “news anchor” style — it sounds like a corporate training video. I use “Adam” (warm, slightly deeper) for educational content and “Rachel” (friendly, conversational) for tutorials.
2. Pre-process your script. Remove visual markers like [VISUAL: description]. Add emphasis markers where needed — ElevenLabs lets you add stress on specific words with `+around+ +these+ words`.
3. Generate in segments. Don’t paste your entire 10-minute script in one go. Split into 30-60 second segments. This gives you:
– Better quality (longer generations sometimes degrade)
– Easier retakes (regenerate one bad segment, not the whole thing)
– Better alignment with visuals (adjust timing per segment)
4. Check for AI artifacts. Listen carefully for:
– Robotic emphasis on wrong syllables
– Weird breathing noises
– Slight metallic echo on certain consonants (especially “s” and “z”)
– Inconsistent volume between segments
ElevenLabs Settings I Use
| Setting | Value | Why |
|———|——-|—–|
| Stability | 35-45% | Lower = more expression, can sound unstable; higher = more robotic |
| Similarity | 75-85% | High = accurate to voice sample, can sound AI-ish |
| Style Exaggeration | 20-30% | Adds natural emphasis without going overboard |
| Speaker Boost | On | Reduces background artifacts |
| Speed | 1.0x default | I adjust +/- 5% per segment based on context |
Pro tip for realism: Add small hesitations, filler words, and natural pauses to your script. “So here’s the thing — brief pause — I actually tested this.” AI voices don’t naturally include these. You have to write them in.
Cost: ElevenLabs Creator plan ($22/month) gives you enough characters for ~10 hours of voiceover. More than enough for a weekly YouTube channel.
Step 3: Visual Assets (60-90 minutes)
This is where most people get stuck, but 2026 tools make it dramatically easier.
What You Need for a 10-Minute YouTube Video
Main footage: 6-8 minutes of video (you’ll cut ~40% in editing)
B-roll / background footage: 3-5 minutes of supplementary clips
Text overlays / graphics: 5-10 static graphics
Screen recordings (if applicable): software demos, website walkthroughs
AI Video Generation (The Heavy Lifting)
For faceless YouTube channels (no host on screen):
Use a combination of Runway Gen-4 and Kling 1.6:
Runway for hero shots: High-quality, cinematic scenes for key moments. Use Motion Brush to animate specific elements.
Kling for B-roll: Longer clips (up to 60 seconds), good for background filler. Way better value per generation.
Pika for transitions and effects: Animated text reveals, style transitions, Pikaffects for visual flair.
Sample generation brief I use with Runway:
“`
Generate: “Slow cinematic pan of a minimalist home office at golden hour,
laptop on desk with a warm coffee mug, plants in background, soft natural
lighting, 1080p, 10 seconds”
Settings: Camera → Pan Right | Style → Cinematic | Aspect → 16:9
“`
For a 10-minute video, I typically generate 20-30 clips and use maybe 12-15. Accept that most generations won’t make the final cut. It’s part of the process.
For talking head videos (host on screen):
Use Synthesia or HeyGen to generate avatar-hosted segments. Script → Avatar → Done. 5 minutes of avatar content takes about 20 minutes to generate and looks professional enough for YouTube.
Canva AI Magic Studio
Canva has become shockingly good at AI-powered design. For text overlays, lower thirds, chapter markers, and end screens:
1. Use “Magic Design” — type what you need (“modern YouTube lower third with channel name”) and Canva generates 10+ options
2. Use “Magic Extend” — expand backgrounds, fix composition on still images
3. Use AI photo editing — remove backgrounds, adjust lighting, even animate still photos
Free Alternative
If you’re on a shoestring budget:
Pexels / Pixabay for stock footage (you can filter by “free commercial use”)
CapCut for basic AI video editing
Luma Dream Machine Free Tier for limited AI generations
Step 4: Assemble and Edit (90-120 minutes)
The Tools
DaVinci Resolve 19 — Free, professional-grade, steep learning curve
CapCut Desktop — Free, way easier, good enough for 90% of YouTube creators
Adobe Premiere Pro — Only if you already have the Creative Cloud subscription
Descript — AI-powered editor where you edit video by editing text (amazing for talking head content)
My CapCut Workflow (Most Efficient)
1. Import assets — Voiceover tracks, AI-generated clips, stock footage, graphics
2. Rough cut — Place voiceover on timeline (that’s your skeleton). Drop visuals above. Rough alignment.
3. Auto-caption — CapCut’s AI generates accurate captions in seconds. Apply “modern” style. This alone increases retention by 30-40%.
4. B-roll replacement — Replace static sections with moving clips. Zoom in/out on still images using Ken Burns effect.
5. Transitions — Use sparingly. Simple cross-dissolve for most cuts. Don’t be the person who uses the spin transition between every sentence.
6. Speed adjustments — Speed up slow sections, slow down important moments
7. Color grade — Apply a LUT (Look Up Table) for consistent color. I use “Cinematic Warm” in CapCut for every video.
8. Export — YouTube recommends H.264, 1080p, 30fps, bitrate 12 Mbps. Don’t overthink this.
The 80/20 Editing Rule
80% of a video’s “quality” comes from 20% of the effort:
✅ Clean audio (remove breaths, normalize volume)
✅ Accurate captions (huge retention driver)
✅ Good pacing (cut dead air, tighten explanations)
✅ Strong intro (first 30 seconds must hook)
The other 80% of effort (color grading, complex transitions, custom animations, 3D effects) adds maybe 20% to quality. Do it if you enjoy it. Don’t if you’re optimizing for time.
Descript — The AI Editor
If you’re doing talking head content (avatar or real), Descript is a game changer. You transcribe your script, and editing video becomes as easy as editing a text document. Delete a sentence → the video automatically cuts. Type new words → the AI voiceover generates matching audio. It’s weird and wonderful.
Step 5: Music and Sound Design (15-20 minutes)
The Tools
Suno or Udio — Generate custom background music with text prompts
Epidemic Sound — Premium library, $15/month, royalty-free for YouTube
StreamBeats by Harris Heller — Free, high-quality, copyright-safe (on Twitch/YouTube)
My Approach
For background music, I use Suno with prompts like:
“`
Generate: “Cinematic ambient background music for educational YouTube video,
no vocals, subtle tension and release, 3 minutes, slow build,
electronic meets orchestral, modern texture”
“`
I generate 2-3 tracks, pick the best one, and layer it at -20dB to -25dB relative to voiceover. Music should be felt, not noticed.
For sound effects, I pull from:
Artlist SFX — Occasional use for specific moments
CapCut built-in sound library — Surprisingly good for free
Critical rule: Always check the copyright terms. Suno/Udio tracks have usage terms — for YouTube monetization, make sure you’re on a paid plan that allows it. Epidemic Sound handles this automatically.
Step 6: AI Thumbnail (20-30 minutes)
Your thumbnail determines whether anyone clicks your video. Full stop. Great content + bad thumbnail = 500 views. Mid content + great thumbnail = 50,000 views.
The Tools
Midjourney V7 — Still the king for custom thumbnails
DALL-E 3 / GPT-5 Image Gen — Good alternative, faster, less detailed
Canva AI Thumbnail Generator — Upload your face, pick a style, instant templates
Krea AI — Real-time editing and upscaling
My Thumbnail Recipe
Composition:
Face close-up (shows expression of surprise, curiosity, or intensity)
3-color palette max (high contrast — e.g., blue background, orange text, white face)
3-5 words of text (bold, legible, curiosity-gap)
No clutter. Remove elements that don’t serve the click-through mission.
Midjourney Prompt I Actually Use:
“`
/imagine a close-up portrait of a thoughtful man with glasses,
surprised expression, cinematic lighting, blue and orange color scheme,
clean composition, hyper-realistic, 16:9 –ar 16:9 –v 7
“`
Then I composite in Canva:
Add the text overlay (font: Impact or similar bold sans-serif)
Add a subtle gradient
Increase contrast by 15%
Export at 1280×720 (YouTube’s recommended thumbnail resolution)
Pro tip: Watch your analytics. If a thumbnail has <5% CTR, change it. I've revived dead videos by swapping thumbnails and seeing CTR jump to 10%+.
Step 7: Metadata and Publishing (15-20 minutes)
The Tools
TubeBuddy or VidIQ — YouTube SEO tools, keyword research, tag optimization
The Process
1. Title: Use TubeBuddy’s AI Title Generator. Input your topic and it suggests 10+ high-CTR title formats. Pick the best one and tweak it personally.
2. Description: First 2-3 lines are crucial (showed in search results). Use this format:
“`
[Compelling summary of what this video is about — 2 sentences]
📚 Key Topics Covered:
• Topic 1
• Topic 2
• Topic 3
🔗 Links & Resources:
[link here]
⏱️ Timestamps:
0:00 — Hook
1:30 — Section 1
…
“`
3. Tags: Use VidIQ to find 10-15 high-volume, low-competition tags. Don’t use tags that don’t relate to your content (YouTube ignores them and may penalize spammy tagging).
4. End Screen + Cards: Add at least one end screen element (subscribe button or video suggestion). Add 2-3 cards linking to related videos at natural break points.
5. Schedule: I publish on Tuesdays at 2 PM EST. Is this the “magic time”? Probably not. But consistency matters more than optimization. Pick a day and stick to it.
The Complete Tool Stack (With Costs)
| Step | Tool | Minimum Plan | Monthly Cost |
|——|——|————-|————-|
| Script | Claude | Claude Pro | $20/mo |
| Script | ChatGPT | ChatGPT Plus | $20/mo |
| Fact Check | Perplexity | Perplexity Pro | $20/mo |
| Voiceover | ElevenLabs | Creator | $22/mo |
| Video Gen | Runway Gen-4 | Standard | $15/mo |
| Video Gen | Kling 1.6 | Basic | $12/mo |
| Editing | CapCut Desktop | Free | $0 |
| Music | Suno | Pro | $10/mo |
| Thumbnail | Midjourney | Standard | $24/mo |
| Thumbnail | Canva Pro | Pro | $13/mo |
| SEO | TubeBuddy | Pro | $5/mo |
| Total | | | ~$161/mo |
Budget version ($38/mo):
ChatGPT Plus ($20)
CapCut AI Voice + Editing (Free)
Stock footage (Free)
Canva Free (Free)
Kling Basic ($12)
Suno basic ($6)
Real Example: My Most Recent Video
Here’s exactly what I did for a video last week titled “I Tested 10 AI Tools to Make $100/Day — Here’s What Actually Worked” (current: 23K views, 8.2% CTR, 47% retention):
| Step | What I Did | Time |
|——|———–|——|
| Research | Searched “AI side hustle” trends → found angle: realistic earnings not get-rich-quick | 25 min |
| Script | Claude wrote 1,800 words → I cut to 1,200 → added personal stories | 40 min |
| Voiceover | ElevenLabs “Brian” (warm, slightly skeptical tone) → 11 segments | 35 min |
| B-Roll | 15 Kling generations (screenshots of tools, coding screens, dashboard views) + 5 Runway hero clips | 75 min |
| Editing | CapCut: Voiceover sync → auto-captions → transitions on key cuts → color LUT | 110 min |
| Music | Suno: “Modern tech documentary background” → -22dB volume | 15 min |
| Thumbnail | Midjourney close-up + Canva text overlay “REAL RESULTS” | 25 min |
| Publishing | TubeBuddy title suggestions → Description with timestamps → 10 tags | 20 min |
| Total | | ~5.8 hours |
Tools used: Claude, Perplexity, ElevenLabs, Runway, Kling, CapCut, Suno, Midjourney, Canva, TubeBuddy.
Common Mistakes (That I’ve Made So You Don’t Have To)
Mistake 1: The Uncanny Valley Gap
AI voiceover + AI video can feel sterile. Viewers sense it. Fix: add human imperfections. Pause at unnatural moments. Include a framing story. Open with a real personal anecdote (even if scripted by Claude). It doesn’t matter if the delivery is AI-generated — the story needs to feel human.
Mistake 2: Over-relying on AI Visuals
It’s tempting to have Runway generate every single frame. Don’t. Mix generated clips with stock footage, screen recordings, static images with Ken Burns effect, and text overlays. Visual variety hides AI visual inconsistencies.
Mistake 3: Inconsistent Voice
Don’t switch AI voices mid-video unless you have a reason. A consistent voice builds audio trust. I use the exact same ElevenLabs voice for all videos on one channel.
Mistake 4: Ignoring Audio Quality
AI voiceover is clean, but your overall mix matters. Badly balanced audio (too much music, uneven volume) ruins the experience. Always do a full listen-through with headphones before exporting. This catches problems your speakers won’t reveal.
Mistake 5: Publishing Without Testing Thumbnails
I spent 6 months guessing thumbnails before I realized I could test them. Create 3-4 options. Use TubeBuddy’s A/B testing. Let data decide. One test boosted my CTR from 4.1% to 7.8%.
The Bottom Line
You can create a professional YouTube video entirely with AI tools in 2026. The workflow works. The tools are good enough. The audience doesn’t care if a robot helped you — they care if the video is useful, entertaining, or both.
But here’s the catch: AI doesn’t replace taste. It replaces execution.
I still need to:
Choose a topic that’s actually interesting
Structure a script that holds attention
Pick the right visual for each moment
Edit for pacing, not just correctness
Design a thumbnail that earns clicks
The AI does the doing. I do the deciding. That’s the partnership. And it’s the only way this works at scale.
Start with one video. Use the tools I listed. Spend your time on the creative decisions, not the technical execution. Let the AI carry the grunt work. You carry the vision.
Want a copy of this workflow as a checklist? I’ll link a printable version in the comments. And if you build your first AI video using this guide, send it to me — I want to see what you create.
This workflow is current as of June 2026. AI tools change monthly. I’ll update this guide when significant changes happen — if you spot something outdated, call it out.